How to crop a screenshot on a Mac

To crop a screenshot on a Mac, open it in Preview, show the Markup toolbar if it isn't showing, choose Rectangular Selection, drag over the part you want to keep and click Crop. If you change your mind straight away, choose Edit › Undo Crop.
Crop a screenshot in Preview
Open the screenshot in Preview.
If the Markup toolbar isn't showing, click Show Markup Toolbar. Then click Rectangular Selection.
Drag over the part of the picture you want to keep.
Click Crop in the Markup toolbar.
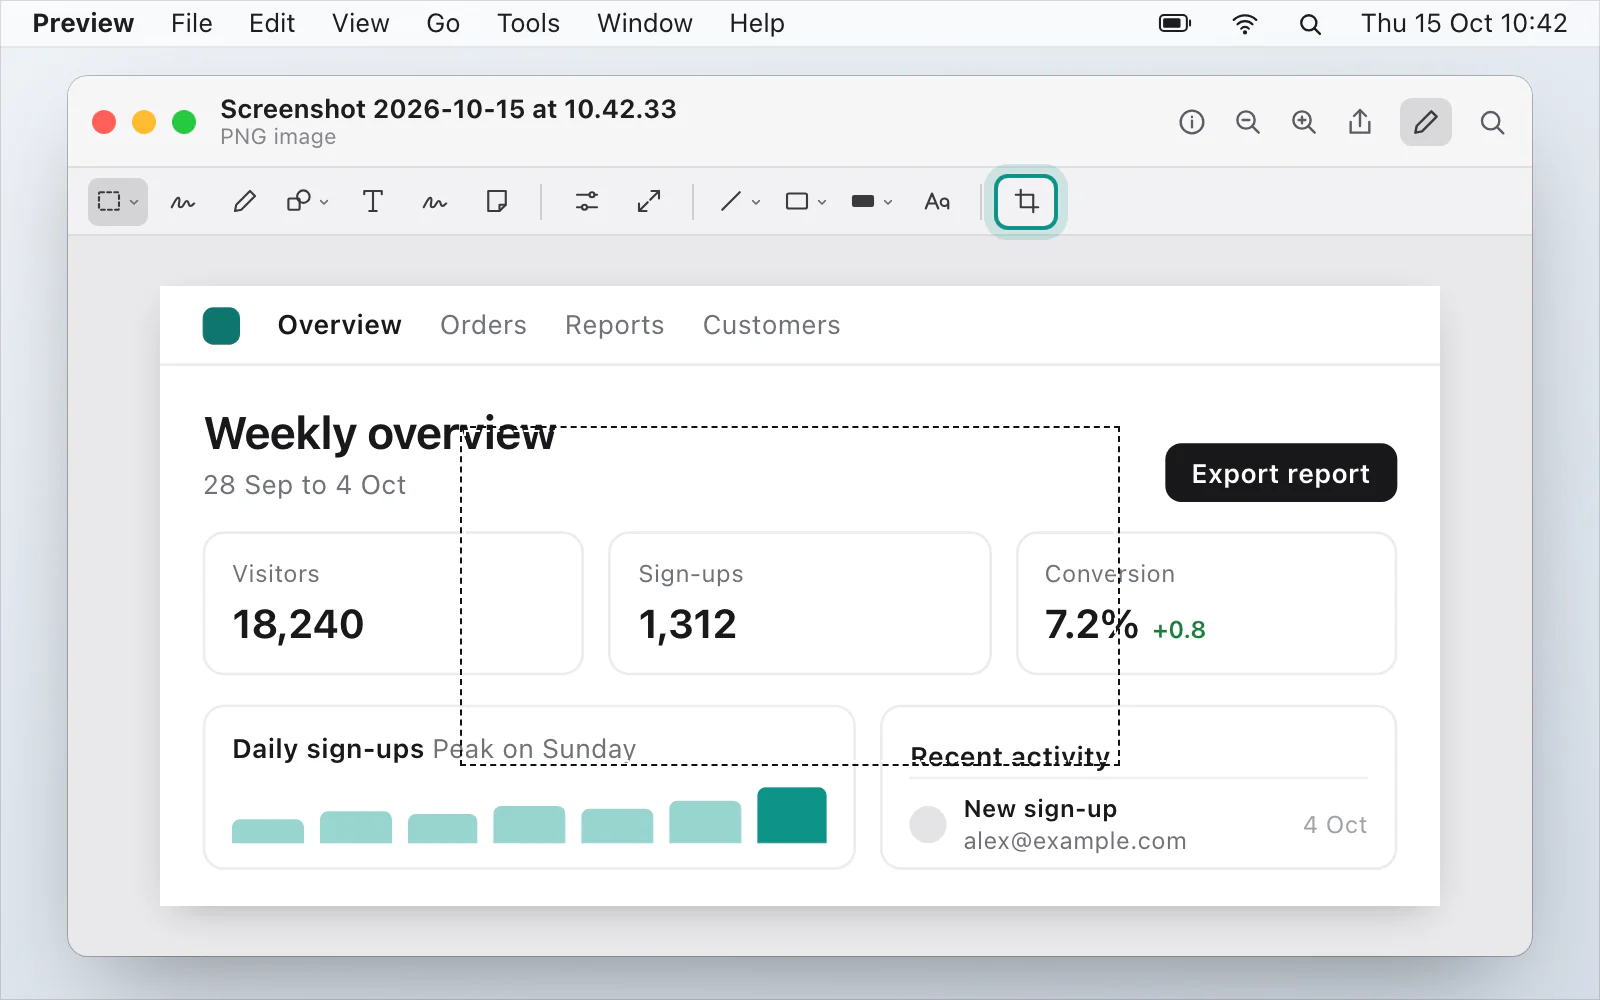
Apple's page on cropping an image in Preview adds two things. To see the size of what you're selecting, choose Tools › Show Inspector, click the Crop Inspector button and pick a unit. And to undo a crop later, not just straight away, choose File › Revert To › Browse All Versions and pick a version from before the crop.
If you want to keep the uncropped screenshot too, select it in the Finder and press CommandD to duplicate it, then crop the copy.
Crop right after you take it
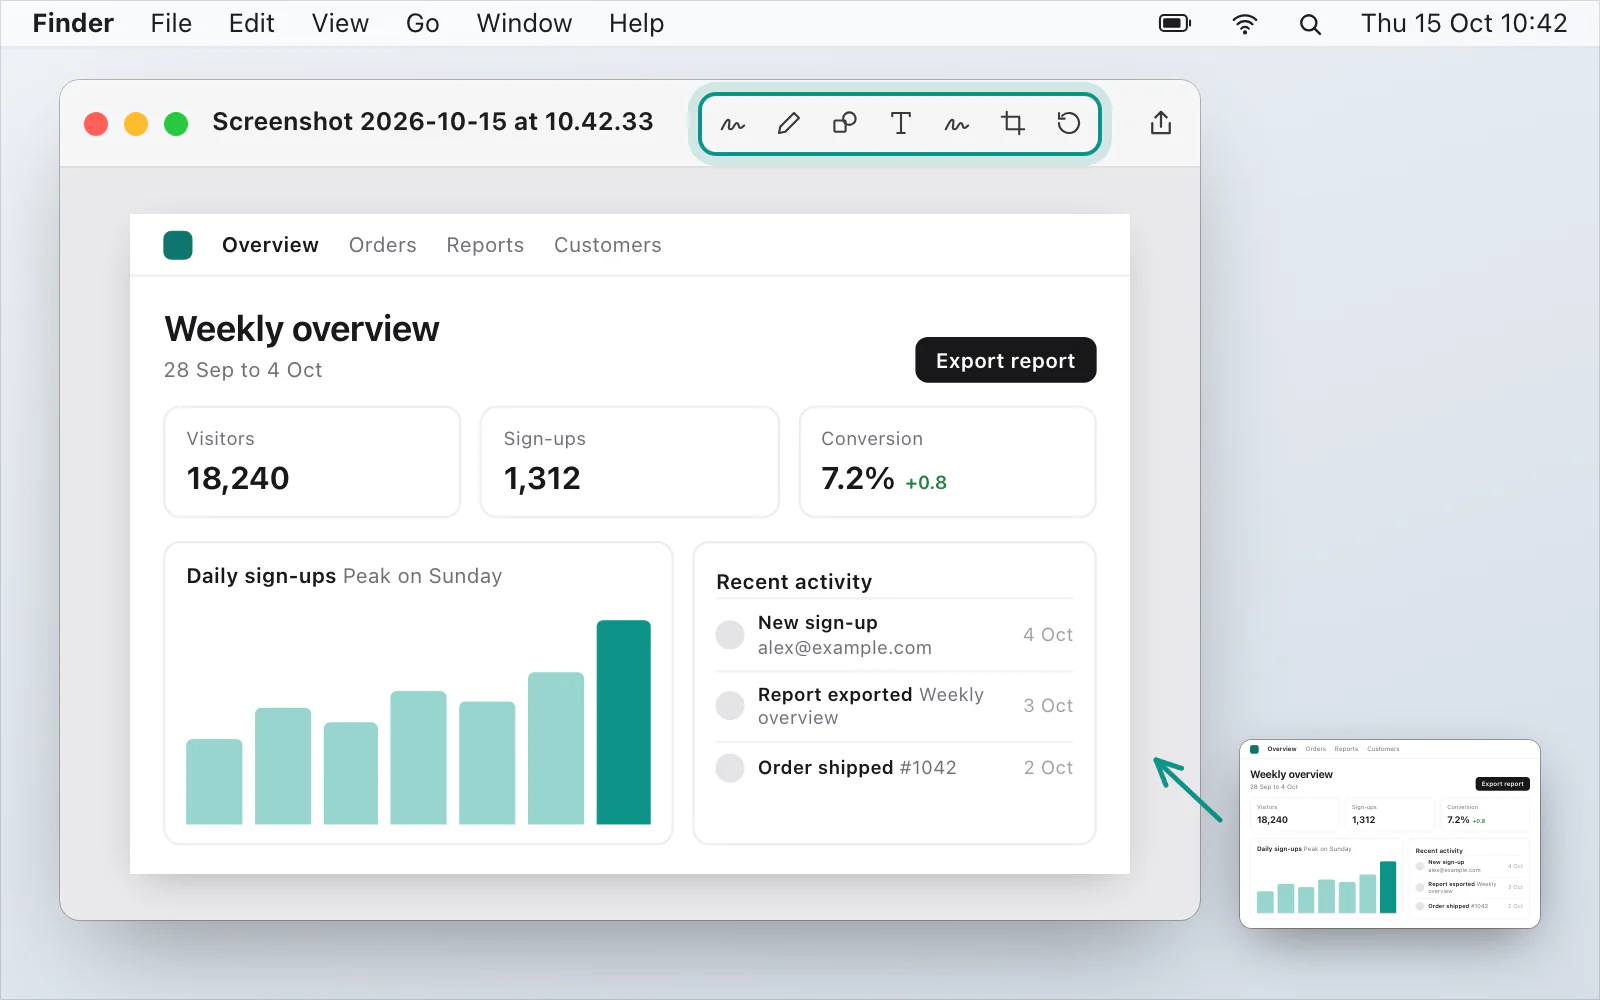
If you see a thumbnail in the corner of the screen, click it. Apple's page says that opens a window where you can mark up the screenshot. Apple's page on marking up files says Markup lets you crop images, but it describes the Crop tool for Quick Look and Quick Actions, and Apple's page on screenshots doesn't list the tools in the thumbnail's window. If you see a Crop tool there, the steps in the Quick Look section below are the ones to follow. The thumbnail only stays for a few seconds. Apple says that if you hold the pointer over it, it stays until you act on it or move the pointer away.
Crop in Quick Look
You don't have to open Preview. In the Finder, select the screenshot and press the Space bar to open Quick Look. Click the Markup button, choose Crop, drag the corner handles until just the area you want to keep is inside the frame, and click Crop. Then click Done. You can drag the frame to move it.
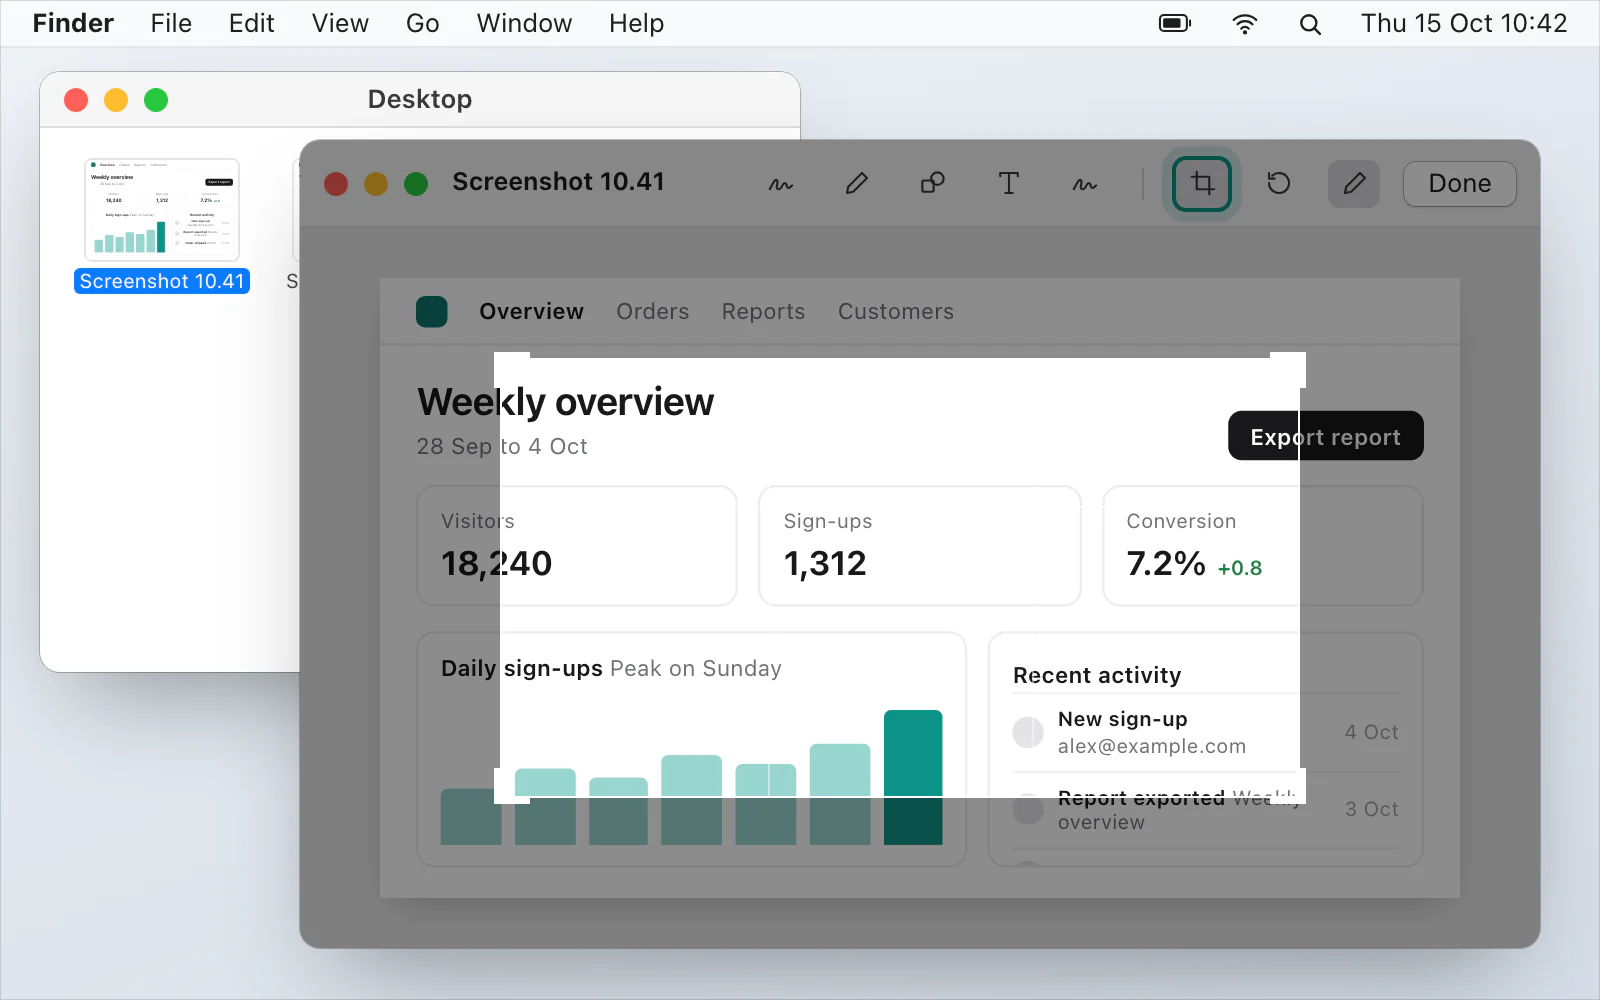
Apple warns that changes made in the Quick Look window can't be undone after you close it, as its page on Markup says. So check the result before you close the window.
Crop in Photos
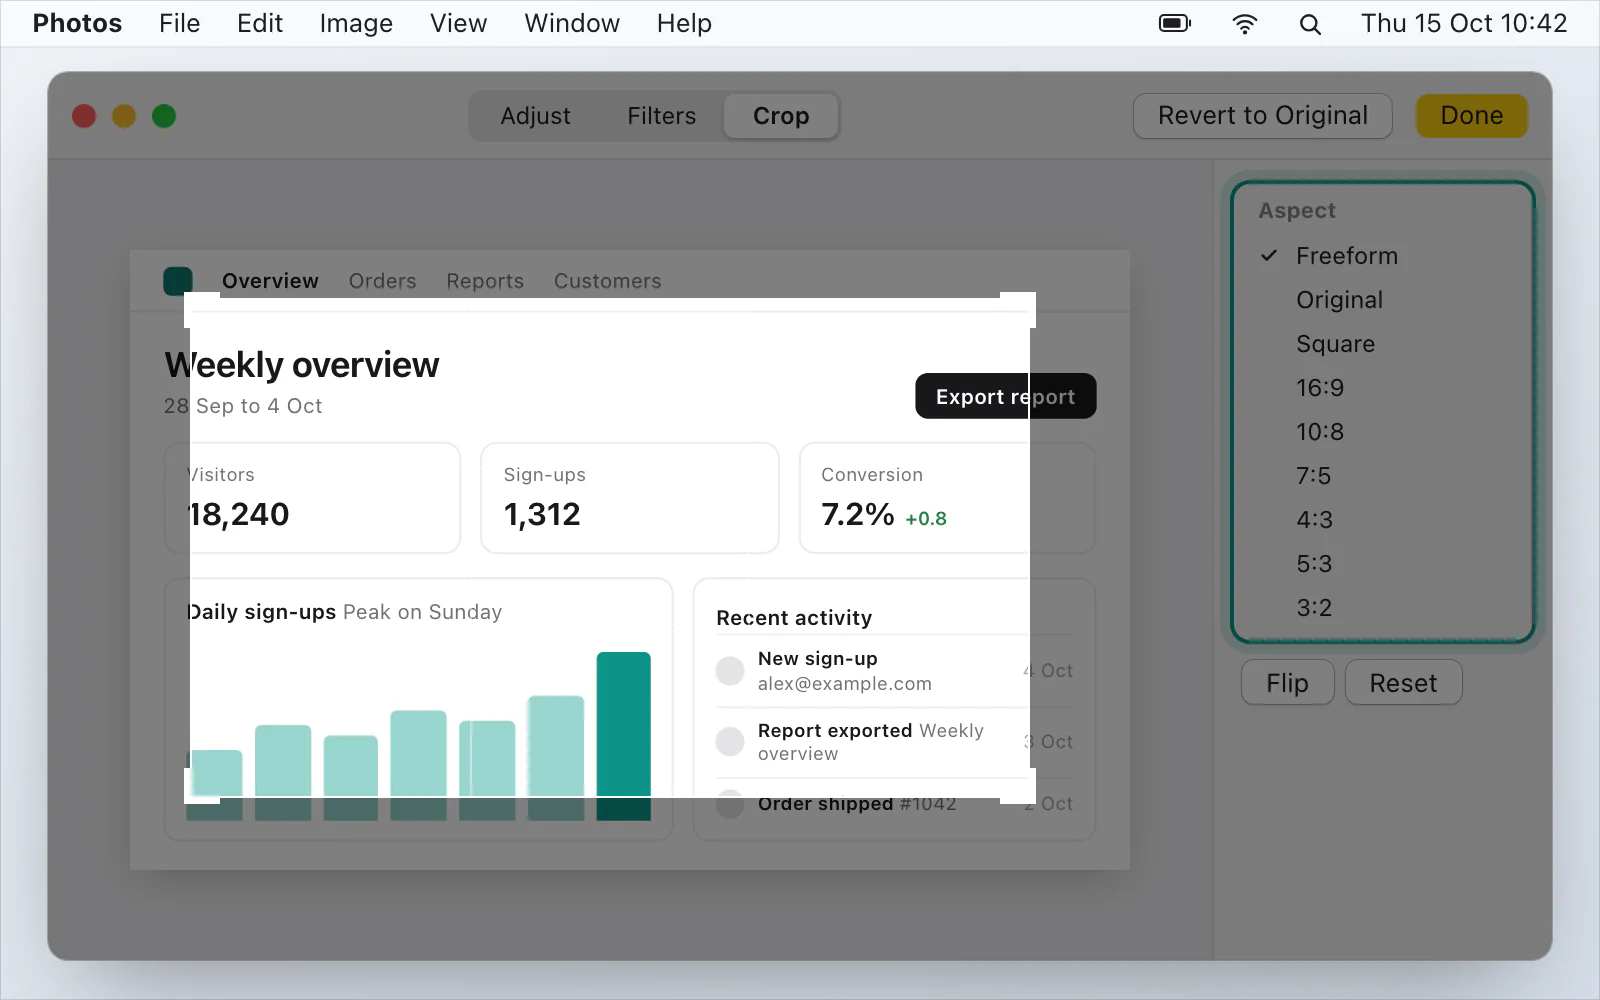
If the screenshot is in your Photos library, double-click it and click Edit, then Crop in the toolbar, and drag the rectangle around the part you want. To crop to set proportions, click one of the aspect ratios in the sidebar, such as Square, 4:5 or 16:9. Click Done to keep the change. Revert to Original stops without saving, and Reset removes the cropping you've done so far. Apple's Photos page warns that cropping a photo changes it everywhere in Photos, including albums, slideshows and projects. To crop without changing it everywhere, duplicate the photo first and edit the duplicate.
Crop, resize or rotate?
Cropping cuts part of the picture away. If you want the whole picture smaller, click Show Markup Toolbar, then Adjust Size, and enter new values for width and height, or choose a size from the Fit into menu. Apple's page says to select Scale proportionally to keep the proportions. To turn the picture, select it and click the Rotate Left tool, and keep clicking to keep turning. Hold Option while you click to turn it right. For a mirror image, choose Tools › Flip Horizontal or Flip Vertical.
Skip the crop
If you haven't taken the screenshot yet, press ShiftCommand4 and drag over only the part you want. Apple's page says that captures just the portion you select, so there's nothing to cut afterwards. The other keys are in Mac screenshot shortcuts. To open the file you took, Where do screenshots go on a Mac? says where to look.
Cropping in VizShot
VizShot's editor has a Crop tool. Press C, drag the part you want to keep, and press Enter or click Apply crop. Esc cancels. Arrows and boxes you've drawn stay on the same part of the picture, and Undo brings back the full size and your marks in one step. [ and ] turn the picture in quarter turns. After the 14-day free trial, saving needs a key. Crop and rotate has the steps, and you can download VizShot.
$8, once, for two computers.
Questions
How do I crop a screenshot on a Mac?
Open it in Preview, choose Rectangular Selection in the Markup toolbar, drag over the part to keep and click Crop. Apple's page for Preview gives those steps.
Can I undo a crop?
In Preview, choose Edit › Undo Crop straight away, or File › Revert To › Browse All Versions later. In Quick Look, Apple says you can't undo after you close the window.
Is there a keyboard shortcut for cropping?
Apple's keyboard shortcuts page for Preview doesn't list one for Crop. It says Preview's menus in the menu bar show the shortcuts, so look there. To avoid cropping, press ShiftCommand4 and capture only the part you want.
How can I see the size of the crop?
In Preview, choose Tools › Show Inspector, then click the Crop Inspector button and choose a unit. It shows the size of what you're selecting.
How do I crop a screenshot to a square?
In Photos, click Edit, then Crop, and choose Square in the sidebar.
Checked against
- Apple: Crop, resize, or rotate an image in Preview on Mac, read 14 October 2026
- Apple: Take screenshots or screen recordings on Mac, read 15 October 2026
- Apple: Mark up files on Mac, read 14 October 2026
- Apple: Crop, extend, reframe, and straighten photos and videos on Mac, read 14 October 2026
- Apple: Take a screenshot on Mac, read 14 October 2026
- Apple: Mac keyboard shortcuts, read 14 October 2026
- Apple: Keyboard shortcuts in Preview on Mac, read 14 October 2026