Mac screenshot settings

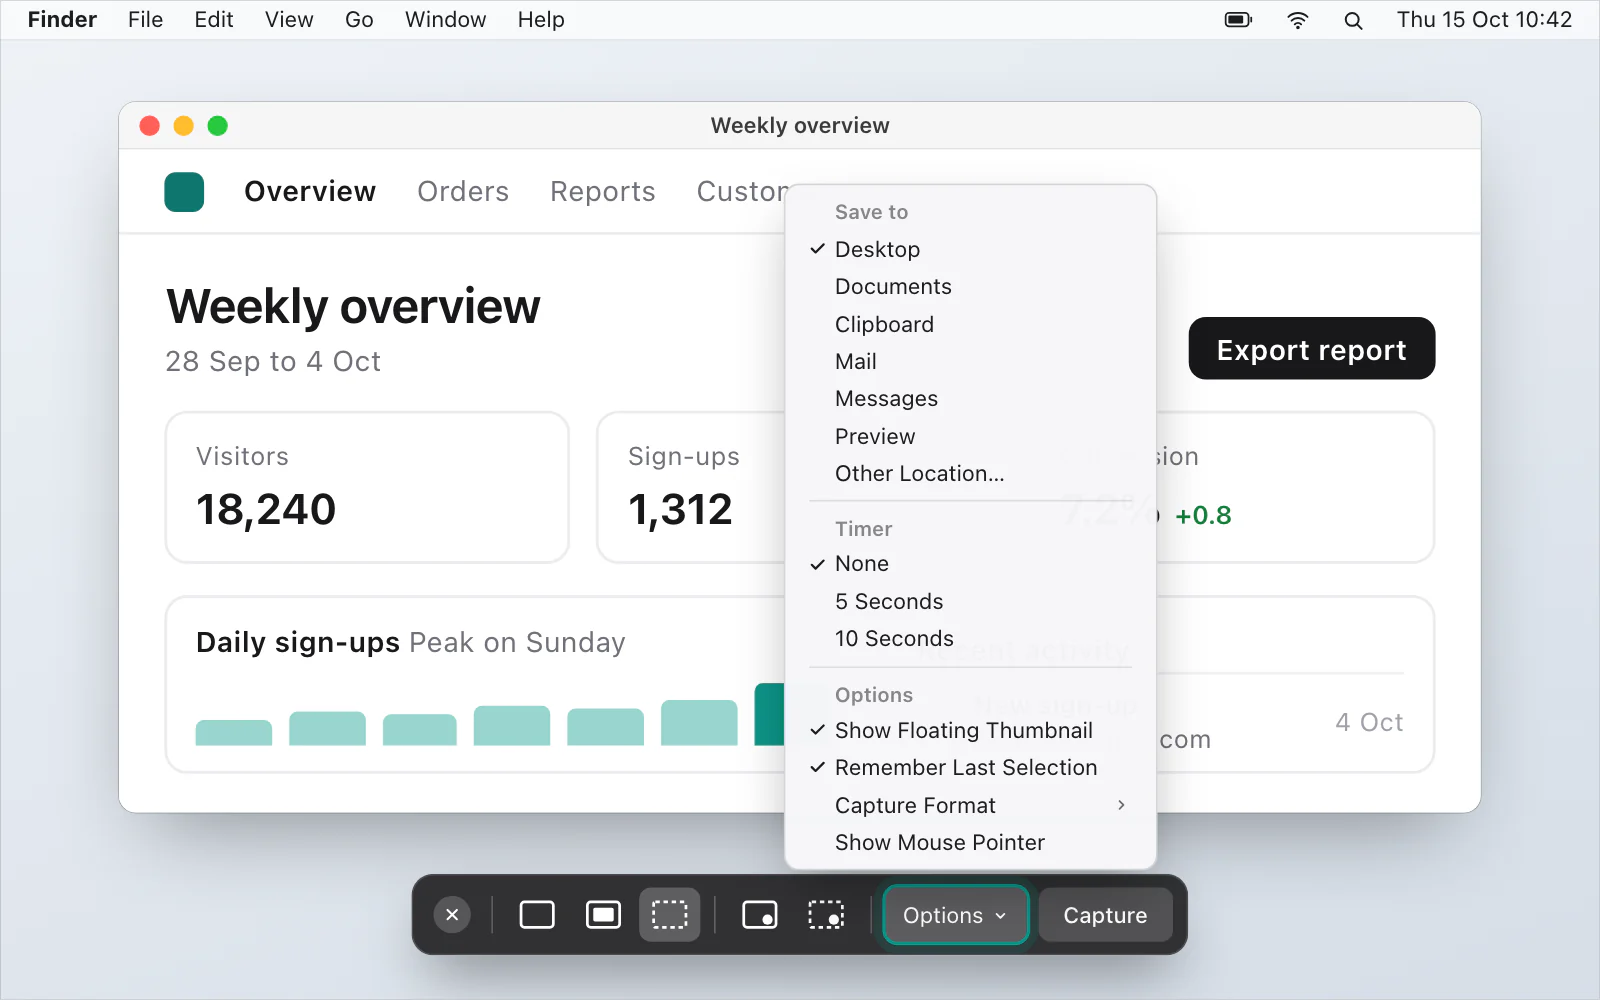
Most Mac screenshot settings are in the Options menu of the Screenshot app: press ShiftCommand5, then click Options. The shortcuts have their own place, in System Settings › Keyboard › Keyboard Shortcuts › Screenshots. Apple's pages don't give a way to change the default file name, and screenshots are PNG files unless you choose HDR on a supported Mac with macOS Tahoe 26 or later.
Where are the Mac screenshot settings?
Press ShiftCommand5, then click Options. Apple's Mac User Guide lists these:
Save to: a preset folder, or Other Location for any folder. Where screenshots go on a Mac has the details.
Timer: how long to wait before the capture starts.
Microphone: for recordings only.
Show Floating Thumbnail: the small picture that appears in the corner after a capture.
Remember Last Selection: keeps the portion you selected for the next capture.
Capture Format: HDR or SDR.
Show Mouse Pointer: puts the pointer in the picture. Screenshot with the cursor goes through it.
For Show Floating Thumbnail, Remember Last Selection and Show Mouse Pointer, a checkmark shows what's on, and choosing the item again takes the checkmark off. Apple says the options you see vary with whether you're taking a screenshot or a recording. Capture Format is on Apple's pages for macOS Tahoe 26 and later, and not on its pages for macOS Sequoia 15 or Sonoma 14. You can also find Screenshot in the Utilities folder, inside Applications.
How do I change the screenshot file name?
Apple's pages give no setting for the name. A new screenshot's name begins with Screenshot or Screen Shot, then the date and time, and Apple's pages write it both ways. You can rename a file once it's saved:
Select the screenshot in the Finder and press Return.
Type the new name and press Return.
To rename several at once, select them, Control-click one and choose Rename. In the pop-up menu choose Format, and Apple says you can put an index, a counter or the date before or after a name you type, and pick the number to start from. Leave the ending (such as .png) alone: Apple warns that changing an extension may stop the file opening in the app that made it.
How do I turn off the screenshot thumbnail?
In Options, click Show Floating Thumbnail so the checkmark goes away. Click it again to bring the thumbnail back.
Apple says the thumbnail floats in the bottom-right corner for a few seconds, before the file is saved to the place you chose. Until it goes you can swipe it right to save at once, drag it into a document, an email, a note or a Finder window, or click it to mark it up or share it. If you hold the pointer over it, it stays on screen until you use it or move the pointer away. Turn it off and you lose the chance to drag, mark up or share the screenshot from the thumbnail.
How do I change the screenshot file type?
Screenshots are saved as .png files. On a supported Mac with macOS Tahoe 26 or later, Apple's page on taking a screenshot adds a choice in Options › Capture Format:
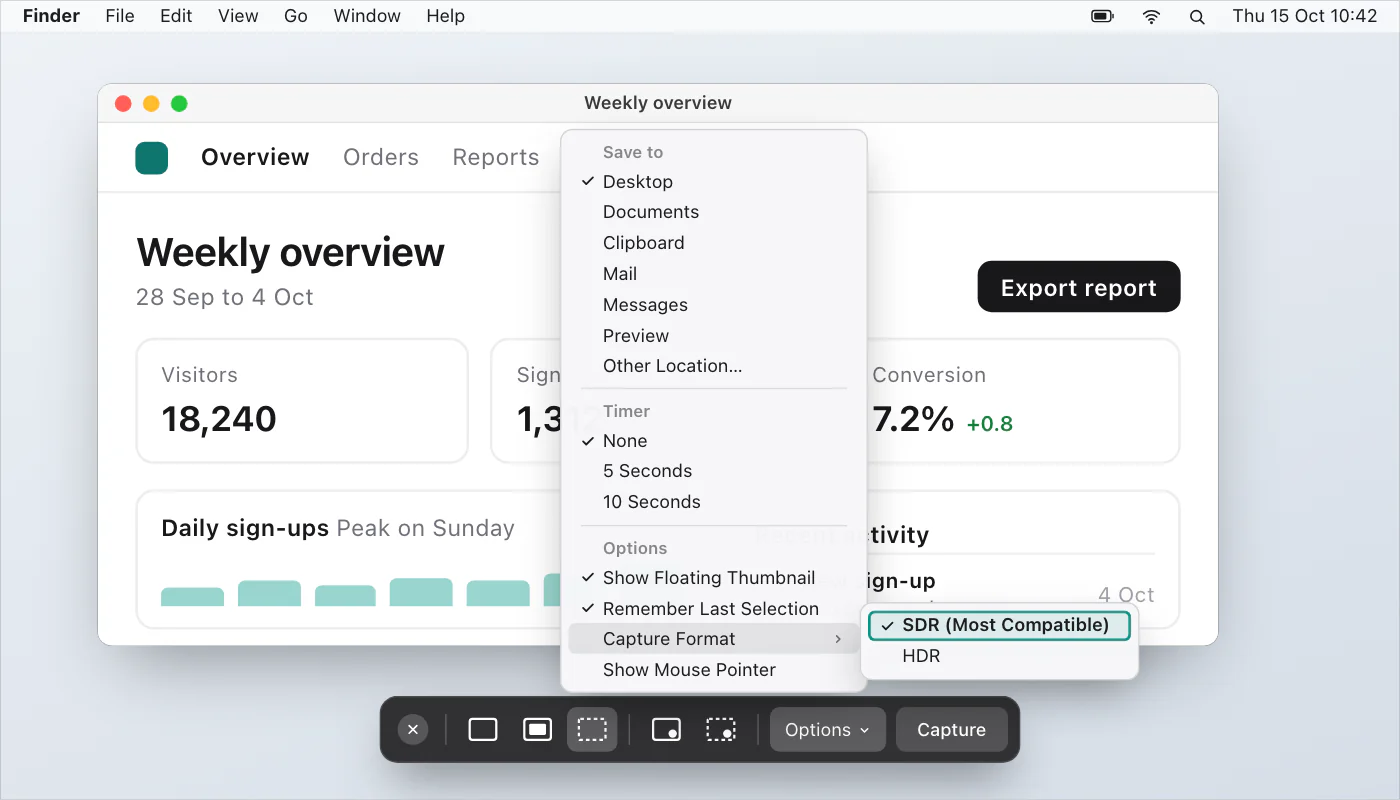
SDR (Most Compatible): PNG.
HDR: HEIF.
The Mac User Guide says HDR captures more brightness and colour but needs an HDR display to see the difference, and that an HDR screenshot shown on an SDR display appears in SDR.
Apple's pages give no setting that makes the Screenshot app save JPEG. To get a JPEG, convert a saved screenshot in Preview. Apple's steps: open it, choose File › Export, and pick a format from the Format menu. The list has HEIC, JPEG, JPEG-2000, OpenEXR, PDF, PNG and TIFF, and JPEG lets you adjust the quality.
PNG or JPEG for a screenshot?
PNG uses lossless compression. JPEG is lossy, and MDN says that suits photographs and can give unsatisfactory results on content that needs sharpness, such as diagrams or charts. The text in a screenshot has sharp edges too, so PNG is the safer default, and JPEG is worth it only when you'd trade some detail for a smaller file.
How do I take a screenshot without the shadow?
For a window, press ShiftCommand4, then the Space bar. Press and hold Option while you click the window, and Apple says the shadow is left out. Apple's pages don't give a setting that turns the shadow off for good.
How do I change the screenshot shortcuts?
Choose Apple menu › System Settings, then click Keyboard in the sidebar. You may need to scroll down.
Click Keyboard Shortcuts, then Screenshots in the sidebar.
Make sure the checkbox next to the shortcut you want to change is selected.
Double-click its current key combination, then press the new keys.
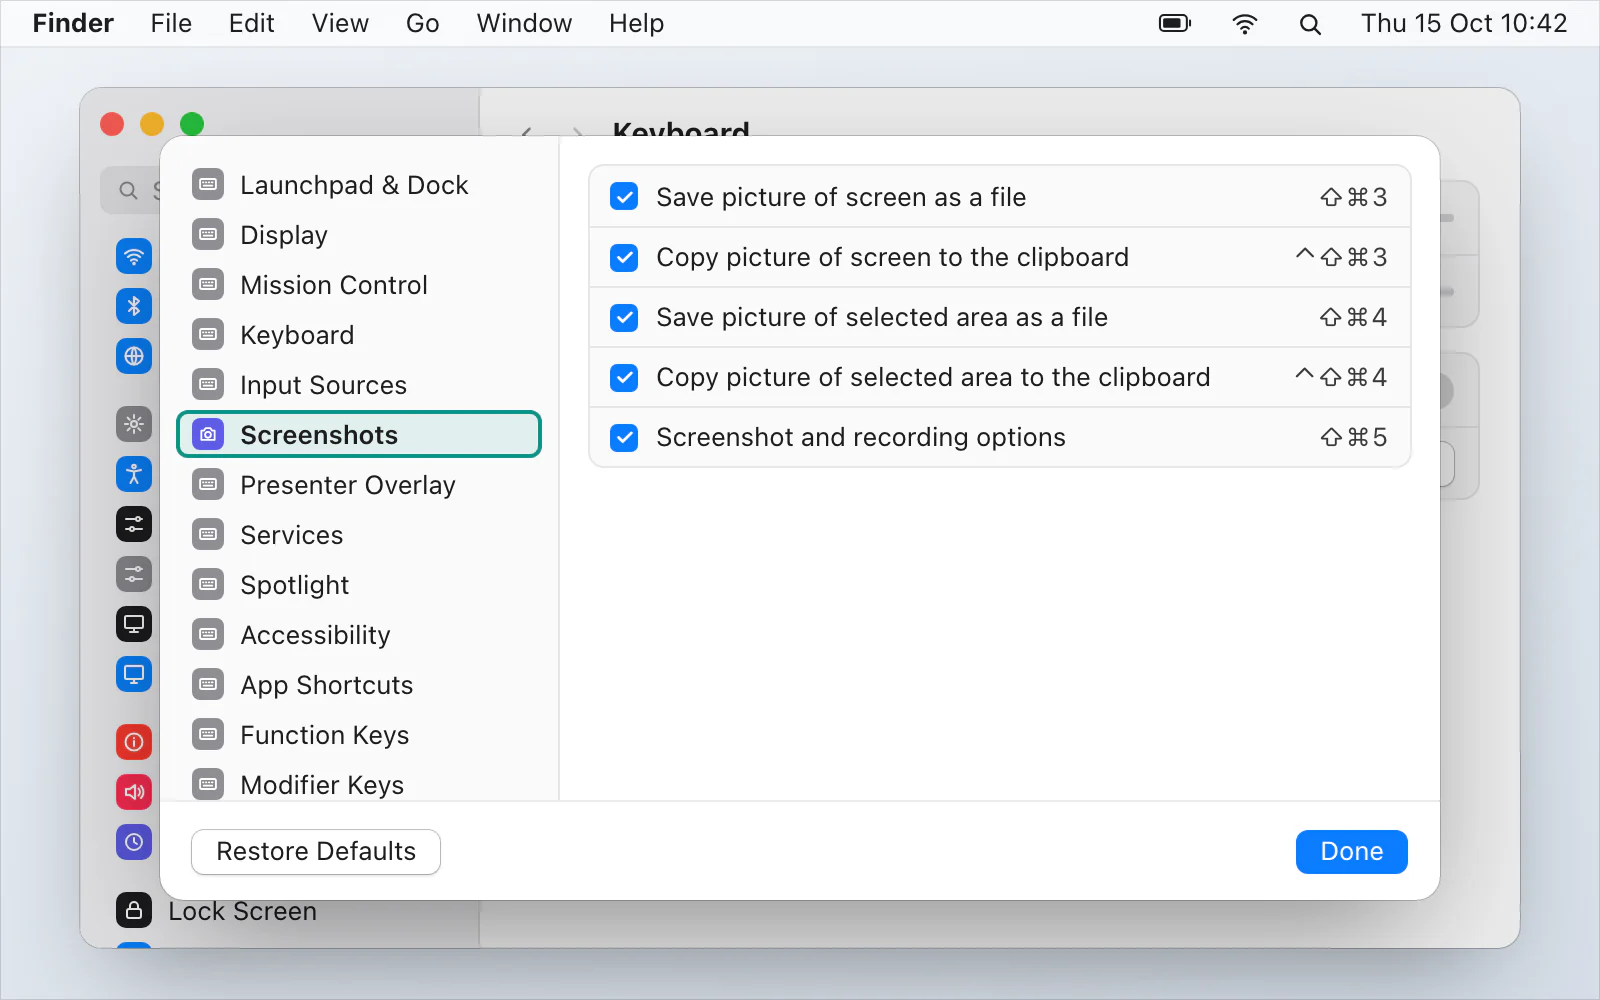
Apple says that deselecting the checkbox turns a shortcut off, and that Restore Defaults, at the bottom left of Keyboard Shortcuts, returns all the shortcuts to their original keys. A warning icon next to a shortcut marks a conflict, and Apple says you change the conflicting shortcut the same way. Mac screenshot shortcuts lists the standard ones, and screenshot not working on a Mac goes through what to check when one does nothing.
What Apple's pages don't cover
Apple's pages don't cover a setting for the default file name, JPEG as a choice in the Screenshot app, or a permanent no-shadow setting. They give no Terminal command for these either, so this page doesn't give one.
If you want the settings in one place
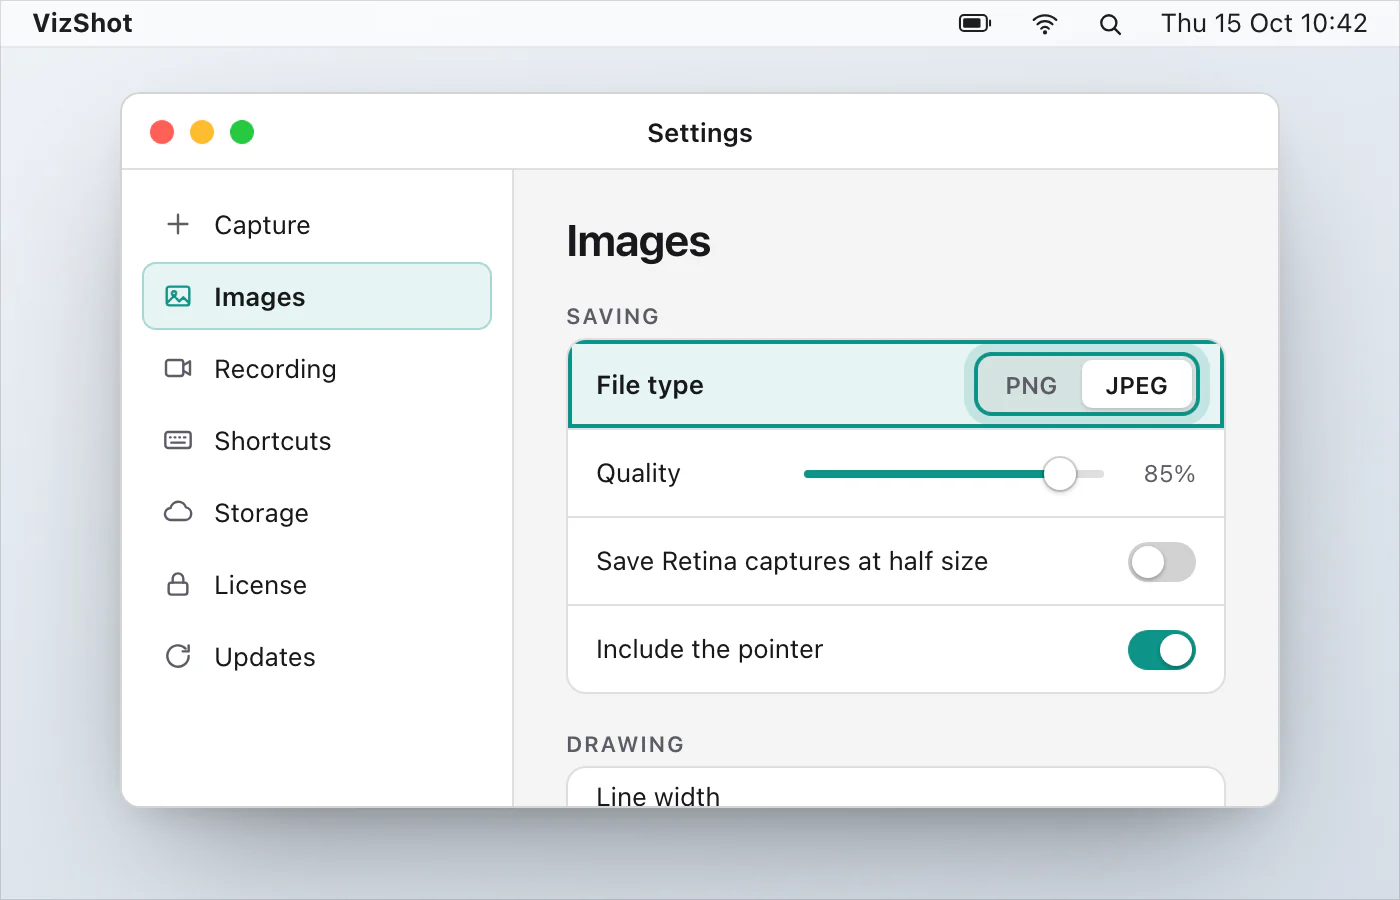
VizShot keeps its settings in one window, separate from the Mac's. Settings › Capture has the folder your captures are saved in, the file name template (the default is VizShot {date} {time}) and what happens after a capture, and Settings › Images has PNG or JPEG, with a JPEG quality from 1 to 100, and Include the pointer, which is off until you switch it on. The keys are in Settings › Shortcuts, and VizShot tells you if another app already uses the ones you pick. Every capture is also copied to your clipboard as a full-size PNG, and after the 14-day free trial saving needs a key while the picture is still copied. File names and formats has the details, and you can download VizShot.
$8, once, for two computers.
Questions
Can I change where a Mac screenshot is saved?
Yes. Open Options in Screenshot and choose a folder under Save to. Where screenshots go on a Mac has the steps.
Can I copy a Mac screenshot instead of saving it?
Yes. Hold Control while you press the shortcut, for example ControlShiftCommand3, or Control-click the thumbnail and choose Save to Clipboard. Copying a screenshot to the clipboard covers it.
Do these settings apply to screen recordings?
Some do. Save to, Timer and Microphone are in the same Options menu, and Apple says the choices you see depend on whether you're taking a screenshot or a recording. Recordings are saved as .mov files.
Why doesn't my Options menu have Capture Format?
Apple lists it for supported Mac models with macOS Tahoe 26 or later, and its pages for macOS Sequoia 15 and Sonoma 14 don't list it. If you don't see it, your Mac or macOS version may not offer it.
Checked against
- Apple: Take screenshots or screen recordings on Mac, read 15 October 2026
- Apple: Take screenshots or screen recordings on Mac, read 15 October 2026
- Apple: Take a screenshot on Mac, read 15 October 2026
- Apple: Rename files, folders, and disks on Mac, read 15 October 2026
- Apple: Convert image file types using Preview on Mac, read 15 October 2026
- Apple: Change a conflicting keyboard shortcut on Mac, read 15 October 2026
- Apple: Use macOS keyboard shortcuts, read 15 October 2026
- MDN: Image file type and format guide - Media, read 15 October 2026